Did you know that the average cost of building a professional recording studio can range from $10,000 to over $100,000? But don’t let that deter you from pursuing your passion for music production.Building Your Own Home Studio On A Budget
With some resourcefulness and smart decision-making, it’s possible to create your own home studio on a budget. In this article, we’ll guide you through the process of setting up a functional and affordable home studio, so you can bring your musical dreams to life without breaking the bank.
Key Takeaways:Building Your Own Home Studio On A Budget
- Investing in ergonomic furniture and arranging equipment strategically can create a cozy and efficient workspace.
- Personalizing the space with artwork or inspirational quotes can enhance motivation and creativity.
- Adding warm lighting, plants, or scented candles can improve the ambiance of the home studio.
- Building a budget-friendly home studio allows for creative exploration and the opportunity to develop skills without breaking the bank.
Assess Your Needs and Set a Budget
Assess your needs and set a budget to determine the essentials for building your own home studio on a budget.
When it comes to creating a home studio, it’s important to first evaluate what you need based on your goals and preferences. Are you recording vocals, instruments, or both? Do you require space for mixing and mastering? Consider these factors as they will influence the equipment and gear you’ll need.
Once you have assessed your needs, it’s time to determine your budget. Decide how much you are willing to spend on each component of your studio, such as audio interfaces, microphones, headphones, and software. Research different options within your price range and read reviews from trusted sources.
By carefully assessing your needs and determining your budget, you can make informed decisions when finding affordable equipment and gear that meet your requirements without compromising quality.
Find Affordable Equipment and Gear
Look for inexpensive equipment and gear to set up your own studio without breaking the bank. When it comes to recording interfaces, there are plenty of affordable options available that still deliver high-quality sound. Look for models that offer a good balance between price and features, such as those from well-known brands like Focusrite or PreSonus.

Additionally, budget-friendly studio monitors can make a huge difference in your home studio setup. There are many options on the market that provide accurate sound reproduction without costing a fortune. Consider brands like JBL or Mackie for reliable yet affordable choices.
Once you have found the right equipment, you can start optimizing your space for optimal sound quality by following some simple guidelines.
Transitioning into optimizing your space for sound quality, it’s important to create an environment that minimizes unwanted noise and enhances the acoustics of your recordings.
Optimize Your Space for Sound Quality
To enhance the sound quality in your space, start by considering how you can optimize the acoustics and minimize unwanted noise. Improving sound isolation is crucial for a home studio on a budget. Here are some tips to help you achieve that:
- Choose a suitable room layout: Position your equipment and gear strategically to maximize space and minimize sound reflections.
- Use furniture and bookshelves: These items can act as diffusers and absorbers, helping to break up standing waves and reduce echo.
- Hang curtains or acoustic panels: These can absorb sound reflections and improve the overall acoustics of your space.
- Seal gaps and cracks: Ensure that windows, doors, and any other openings are properly sealed to prevent outside noise from leaking in.
- Consider using acoustic foam or bass traps: These materials are affordable options for treating specific problem areas in your room.
By optimizing your space for sound quality, you’ll be ready to move onto setting up proper acoustic treatment.
Set Up Proper Acoustic Treatment
Now that you’ve optimized your space for sound quality, it’s time to set up the proper acoustic treatment. Achieving good acoustics in a home studio is crucial for getting professional-quality recordings.
There are various acoustic treatment options available, depending on your budget and needs. One option is to invest in specialized sound-absorbing panels that can be easily mounted on walls and ceilings. These panels help reduce echoes and unwanted reflections, improving the overall clarity of your recordings.
Another cost-effective option is DIY soundproofing techniques such as using heavy curtains or blankets to absorb sound or building bass traps with foam insulation boards.
By implementing these acoustic treatments, you’ll create a more controlled and accurate listening environment in your home studio.
To ensure top-notch audio quality, investing in good quality microphones is essential.
Invest in Good Quality Microphones
If you want professional-quality recordings, it’s crucial to invest in good quality microphones. Here are some tips to help you choose the right ones for your home studio:
- Research Good Microphone Brands: Look into reputable brands like Shure, Audio-Technica, Neumann, and Rode. They offer a range of options that suit different recording needs.
- Consider Different Types: Dynamic microphones are great for capturing loud sound sources like drums and electric guitars, while condenser microphones excel at capturing vocals and acoustic instruments with precision.
- Don’t Forget Accessories: Alongside the microphone itself, consider investing in essential accessories like pop filters to reduce plosive sounds, shock mounts to isolate vibrations, and microphone stands for stability during recording sessions.
- Test Before Buying: Whenever possible, try out different microphones before making a purchase to find the best fit for your specific recording requirements.
Investing in good quality microphones will significantly improve the sound of your recordings. But don’t worry if you’re on a tight budget – there are DIY solutions for equipment that we’ll explore in the next section.
Consider DIY Solutions for Equipment
Considering DIY solutions for equipment can be a cost-effective option when setting up your home studio. Not only does it save you money, but it also allows you to customize and personalize your setup according to your specific needs. One DIY solution worth exploring is building your own microphone. There are numerous online tutorials available that guide you through the process of creating a functional microphone using affordable components. Additionally, homemade soundproofing can significantly improve the quality of your recordings without breaking the bank. You can create soundproof panels by using materials like foam or fiberglass insulation, which can be easily found at hardware stores. By implementing these DIY solutions, you can achieve professional-level results without spending a fortune on fancy equipment. Now let’s transition into learning basic audio recording and editing techniques for maximizing the potential of your home studio setup.
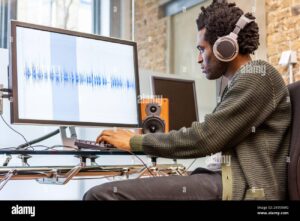
Learn Basic Audio Recording and Editing Techniques
Start by learning basic audio recording and editing techniques to maximize the potential of your home studio setup. Understanding the fundamentals of audio recording will allow you to capture high-quality sound in your recordings. Here are three key techniques to get started:
- Proper microphone placement: Experiment with different positions and angles to find the best sound for each instrument or vocalist.
- Gain staging: Maintain consistent levels throughout the recording process to avoid distortion or clipping.
- Noise reduction: Use tools like noise gates and filters to remove unwanted background noise from your recordings.
Once you have mastered these basic audio recording techniques, it’s time to move on to beginner-friendly editing software. There are plenty of free or affordable options available that offer a wide range of features for editing and mixing your recordings. These tools will help you fine-tune your tracks, add effects, and create a polished final product.
Transitioning into the next section, let’s explore how to utilize free or affordable recording software effectively.
Utilize Free or Affordable Recording Software
To make the most of your recording setup without breaking the bank, you can take advantage of free or affordable recording software options. There are many affordable recording software alternatives available that offer professional-level features for a fraction of the cost.
Some popular options include Reaper, Audacity, and Cakewalk by BandLab. These programs provide multi-track recording capabilities, along with a variety of editing tools to enhance your recordings. Additionally, there are numerous free plugins available that can be used with these software programs to further expand their functionality.
These plugins can add effects, virtual instruments, and other enhancements to your recordings. By utilizing these affordable software options and incorporating free plugins, you can create high-quality recordings without spending a fortune on expensive software.
Now let’s move on to how you can create a comfortable and inspiring workspace for your home studio setup…
Create a Comfortable and Inspiring Workspace
Designing a cozy and motivating workspace is essential for optimal productivity in your home studio setup. Here are four key tips to create a comfortable and inspiring environment:
- Invest in ergonomic furniture: Choose a chair that provides proper support and a desk at the right height to prevent strain on your body during long recording sessions.
- Arrange your equipment strategically: Position your instruments, microphones, and monitors within easy reach for seamless workflow.
- Personalize the space: Hang artwork or inspirational quotes that resonate with you to foster creativity and motivation.
- Enhance the ambiance: Use warm lighting, plants, or even scented candles to create a calming atmosphere that helps you stay focused.
By designing furniture and creating a cozy atmosphere, you’ll be able to fully immerse yourself in your music-making process.
Transitioning into the next section, remember to experiment and have fun with your home studio setup while exploring new creative possibilities without limitations.
Experiment and Have Fun with Your Home Studio Setup
Get ready to have a blast experimenting and having fun with your home studio setup!
One of the benefits of building your own home studio is the freedom to explore and experiment creatively. With a budget-friendly setup, you can push boundaries, try out new techniques, and discover unique sounds without breaking the bank.
Experimentation allows you to find your own style and develop your skills as a producer or musician. Don’t be afraid to think outside the box and take risks in your creative exploration. Whether it’s testing different microphone placements, playing around with effects pedals, or trying unconventional recording methods, the possibilities are endless.
Embrace the joy of discovery and let your imagination run wild in your home studio. Remember, it’s not just about creating music; it’s about enjoying the process too!
Frequently Asked Questions
How can I determine my specific needs for a home studio setup?
To determine our specific needs for a home studio setup, we must first consider our budget. Once determined, we can research equipment that fits within our financial constraints while still meeting our recording and production requirements.
Are there any cost-effective alternatives to expensive recording equipment?
There are affordable recording software options available, such as Audacity and GarageBand. Additionally, DIY studio equipment alternatives like homemade acoustic panels and vocal booths can be cost-effective solutions for building your own home studio.
What are some effective ways to improve the sound quality in my home studio space?
Improving acoustics and DIY soundproofing are effective ways to enhance sound quality in a home studio. We can optimize the space by using acoustic panels, bass traps, and sealing gaps to minimize outside noise interference.
How do I properly set up acoustic treatment in my home studio?
Proper room acoustics are essential for a well-balanced sound in your home studio. DIY acoustic treatment can be cost-effective and effective. Start by placing bass traps in corners, adding diffusers and absorbers strategically, and using curtains or rugs to minimize reflections.
What are some recommended microphone options that offer good quality at an affordable price?
We found some great budget-friendly microphone recommendations that offer good quality. These options are perfect for those looking to set up their own home studio without breaking the bank.
Conclusion
In conclusion, building your own home studio on a budget is not only achievable but also a rewarding endeavor. By assessing your needs, finding affordable equipment, and optimizing your space for sound quality, you can create a professional recording environment without breaking the bank.
Investing in good quality microphones is also crucial to achieving high-quality recordings. Learning basic audio recording and editing techniques, utilizing free or affordable software, and creating a comfortable and inspiring workspace will elevate your creativity to new heights.
Remember, Rome wasn’t built in a day – so embrace the journey and let the music be the bridge that connects your dreams to reality.