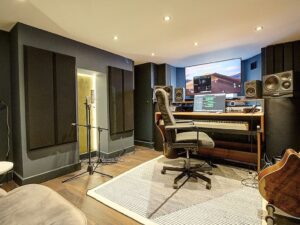
Are you tired of the constant noise interruptions while trying to create music or record podcasts in your home studio? Well, fear not! We have the solution to your soundproofing woes.
Turning your space into a sanctuary of silence is easier than you think. In this article, we will delve into the world of soundproofing and provide you with practical tips and techniques to make your home studio a haven for uninterrupted creativity.
From identifying and sealing air leaks to installing acoustic panels and soundproof curtains, we will explore various methods that can significantly reduce unwanted noise.
Additionally, we’ll discuss how heavy furniture, carpets, and rugs can serve as effective sound barriers. Furthermore, upgrading doors and windows with specialized materials or using soundproofing paint or wallpaper can further enhance the acoustics within your studio.
So, if you’re ready to reclaim tranquility in your creative space, join us as we embark on this journey towards a perfectly soundproofed home studio.
Let’s dive in!
Key Takeaways of How Can I Make My Home Studio Soundproof?
- Assess the current soundproofing materials and measure sound levels to identify areas for improvement.
- Use a combination of techniques such as sealing air leaks, using acoustic panels and curtains, and adding heavy furniture or bookshelves as sound barriers.
- Consider building a soundproof booth or enclosure for optimal soundproofing.
- Upgrade doors and windows with specialized soundproofing materials to further reduce unwanted noise.
Assess the Current Soundproofing of Your Home Studio
Take a moment to really listen and feel the cacophony of external noise invading our sacred creative space. To effectively soundproof our home studio, we need to assess the current soundproofing materials and measure the sound levels.
Begin by inspecting the walls, windows, doors, and floors for any gaps or weak spots that could be allowing noise to leak in or out. Look for cracks, holes, or poorly sealed edges that may need attention.
Additionally, consider testing the effectiveness of existing insulation materials by conducting a sound test from both inside and outside the studio. Use a decibel meter to measure the sound levels in different areas of the room and identify problem areas that require improvement.
Once we have assessed our current soundproofing situation, we can move on to identifying and sealing any air leaks without compromising on style or functionality.
Identify and Seal any Air Leaks
Start by identifying and sealing any air leaks in your space to enhance the acoustic insulation. Soundproofing techniques for recording vocals require a well-sealed room, as even small gaps can let unwanted noise seep into your home studio.
Conduct a thorough inspection of the windows, doors, electrical outlets, and any other potential points of air leakage. Use weatherstripping or caulking to seal these gaps effectively.
Additionally, implementing effective DIY methods for reducing outside noise involves addressing air leaks. By sealing these openings, you prevent sound from entering or leaving your studio through them. This step is crucial for creating an environment with optimal sound quality and minimal external disturbances.
To further improve the soundproofing of your home studio, consider installing acoustic panels or soundproof curtains. These additions will provide additional insulation against outside noises and enhance the overall acoustics within your space.
Install Acoustic Panels or Soundproof Curtains
To enhance the acoustics in your space, consider adding acoustic panels or soundproof curtains. These soundproofing techniques can significantly reduce the amount of noise that enters or leaves your home studio.
Acoustic panels are made from materials specifically designed to absorb and diffuse sound waves, while soundproof curtains are thick and heavy, effectively blocking out unwanted noise. When installing acoustic panels, it’s important to strategically place them on walls and ceilings where sound reflections are most prominent.
Soundproof curtains can be hung over windows and doors to further prevent noise leakage. However, if you’re looking for alternative options, you can also use heavy furniture or bookshelves as sound barriers. By positioning them strategically around your studio space, they can help block out external noise sources and improve overall acoustics.
Use Heavy Furniture or Bookshelves as Sound Barriers
Arrange your heavy furniture or bookshelves strategically around your space to create effective sound barriers and improve the overall acoustics. Utilizing these items as soundproofing materials is a cost-effective DIY technique that can significantly reduce noise transmission within your home studio.
Here are some ways you can maximize their effectiveness:
- Position tall bookshelves along the walls to create a physical barrier that absorbs and diffuses sound waves.
- Place heavy furniture, such as sofas or cabinets, against shared walls or near windows to block external noises from entering your space.
- Use sturdy shelves filled with books or other dense objects to further enhance sound absorption.
By incorporating these methods, you can effectively minimize sound leakage and improve the quality of recordings in your home studio. Additionally, adding carpet or rugs to reduce echoes… [transition sentence]
Add Carpet or Rugs to Reduce Echoes
By incorporating a touch of whimsy into your flooring choices, the addition of plush carpets or luxurious rugs can transform your space from a mere studio to a cozy sanctuary, banishing echoes and creating an acoustic haven. Not only do carpets and rugs add warmth and style to your home studio, but they also play a crucial role in reducing sound reflections and echoes. The soft fibers of the carpet or rug absorb sound waves, preventing them from bouncing off hard surfaces like walls and floors. To further enhance the soundproofing effect, consider using acoustic tiles on the walls. These specially designed tiles are made to absorb sound, minimizing reflections and echoes even more effectively. Additionally, you can use soundproofing curtains for added insulation against external noise sources. By combining these elements, you can create an environment that is perfect for recording high-quality audio without any unwanted reverberation or interference. Now let’s explore how to build a soundproof booth or enclosure for even greater isolation.”
Build a Soundproof Booth or Enclosure
Create a sophisticated and isolated space by constructing a soundproof booth or enclosure in your home studio. This will help minimize external noise and echoes, ensuring optimal sound quality for your recordings.
Here are some DIY techniques and soundproofing materials to consider:
- Use mass-loaded vinyl (MLV) or acoustic foam panels to line the walls of the booth. These materials absorb and block sound waves, preventing them from entering or leaving the space.
- Install a double-layered drywall with Green Glue compound in between for enhanced sound isolation.
- Seal any gaps, cracks, or holes with weatherstripping tape or acoustic caulk to prevent sound leakage.
- Consider using a solid-core door with weatherstripping and acoustic seals to further isolate the booth.
By incorporating these soundproofing techniques and materials, you can create an acoustically controlled environment within your home studio. Upgrading your doors and windows with soundproofing materials is another effective step towards achieving maximum sound isolation for your recordings.
Upgrade your Doors and Windows with Soundproofing Materials
To further enhance the soundproofing of your home studio, we can explore upgrading your doors and windows with specialized soundproofing materials. Doors and windows are often weak points when it comes to sound leakage, so addressing them is crucial for achieving optimal acoustic isolation.
For doors, consider installing solid core doors or adding mass-loaded vinyl (MLV) barrier sheets to existing ones. Sealing any gaps with weatherstripping will also help prevent sound from escaping or entering the room.
When it comes to windows, double-glazed or laminated glass can significantly reduce noise transmission. Additionally, applying soundproof curtains or window inserts made of dense materials like acrylic can provide an extra layer of insulation.
Remember that a comprehensive approach involves treating not just the doors and windows but also the floors, ceilings, and walls. Incorporating soundproofing materials such as acoustic panels, bass traps, resilient channels, and mass-loaded vinyl into these surfaces will greatly minimize external noise interference.
Next up in our journey toward a fully soundproofed home studio is exploring how to use soundproofing paint or wallpaper…
Use Soundproofing Paint or Wallpaper
Ah, the wonders of soundproofing paint or wallpaper – a seemingly magical solution to all your noisy woes. These innovative products are designed specifically to reduce noise transmission and enhance the acoustics within a space. Soundproofing paint contains special additives that absorb sound waves and prevent them from bouncing off walls, while soundproofing wallpaper features layers of materials that block unwanted noise.
Here are three key benefits of using soundproofing paint or wallpaper:
- Improved Sound Absorption: By applying these products to your walls, you can significantly reduce echo and reverberation in your home studio, creating a more controlled acoustic environment.
- Easy Installation: Unlike traditional soundproofing methods that require extensive remodeling, soundproofing paint or wallpaper can be easily applied like any other painting or wallcovering project.
- Aesthetic Appeal: These products come in various colors and textures, allowing you to maintain the desired look of your home studio while improving its soundproofing capabilities.
Now, let’s move on to our next step – installing soundproofing foam or insulation in the walls…
Install Soundproofing Foam or Insulation in the Walls
Start by installing soundproofing foam or insulation in your walls to create a barrier against unwanted noise, immersing you in a peaceful and quiet environment.
When it comes to installing soundproofing foam, choose a high-density option that effectively absorbs sound waves. Begin by measuring the dimensions of your wall and cutting the foam panels accordingly. Apply adhesive to the back of each panel and firmly press them onto the wall surface. For maximum effectiveness, make sure there are no gaps between panels.
Alternatively, you can use insulation to achieve similar results. Install fiberglass or mineral wool batts within the wall cavities, making sure they fit snugly and cover all areas thoroughly. This will help minimize airborne sound transfer through the walls.
Consider hiring a professional soundproofing company for more extensive modifications and enhanced results without compromising on quality.
Consider Hiring a Professional Soundproofing Company
Now that we’ve explored the option of installing soundproofing foam or insulation in the walls, let’s consider hiring a professional soundproofing company. There are several benefits to enlisting the expertise of professionals. Firstly, they possess extensive knowledge and experience in soundproofing techniques, ensuring optimal results. They’ll assess your specific needs and tailor a solution that suits your home studio’s requirements.
Additionally, professional soundproofing companies use high-quality materials and advanced technologies that may not be readily available to individuals attempting a DIY approach. To maintain the effectiveness of your soundproofing efforts, it’s essential to regularly inspect for any signs of wear or damage, such as cracks or gaps in walls or windows. Regular cleaning and maintenance of installed materials will also help prolong their lifespan and ensure continued noise reduction capabilities in your home studio setup.
Frequently Asked Questions
Are there any DIY methods to soundproof a home studio without spending a lot of money?
For those looking for affordable soundproofing solutions, there are several DIY methods available. One option is to use weatherstripping or acoustic caulk to seal any gaps in doors and windows. Adding thick curtains or blankets can also help absorb sound.
How effective are soundproof curtains in reducing outside noise?
Soundproof curtains can be effective in reducing outside noise, but they are not as effective as double glazing. Soundproof curtains work better for reducing high frequency noise rather than low frequency noise.
Can adding acoustic panels or soundproof curtains also improve the acoustics within the home studio?
Adding acoustic panels or soundproof curtains can improve the acoustics within a home studio. Acoustic panel installation reduces echo and improves sound quality, while soundproof curtain alternatives absorb and block unwanted noise, enhancing the overall audio experience.
Is it necessary to soundproof windows and doors in a home studio?
Yes, it is necessary to soundproof windows and doors in a home studio. Sound can easily leak through these openings, so using soundproofing alternatives such as seals, double glazing, or acoustic curtains can significantly improve the soundproofing performance. However, it’s important to consider the additional cost of these measures when planning your soundproofing project.
What are the benefits of hiring a professional soundproofing company instead of doing it myself?
The benefits of hiring a professional soundproofing company instead of doing it ourselves include their expertise in assessing and implementing the most effective solutions. DIY methods may lack proper knowledge and materials, leading to subpar results.
Conclusion
In conclusion, soundproofing your home studio is essential for creating a professional and distraction-free environment. By assessing the current soundproofing, sealing air leaks, and installing acoustic panels or curtains, you can significantly improve the acoustics of your space. Using heavy furniture or bookshelves as barriers, adding carpet or rugs to reduce echoes, and upgrading doors and windows with soundproofing materials are also effective measures. Additionally, using soundproofing paint or wallpaper, installing foam or insulation in the walls, and considering professional help if needed are recommended. So, invest in soundproofing measures and enjoy a truly immersive recording experience.


